
Mar 4, 2019 • Avik Das
If you followed my last post on wrapping Raylib with Ruby, you’ll have a workable way of writing Raylib-based applications in Ruby. However, any automated translation between languages will have some rough edges. In this post, I’ll go over these rough edges, and how you can smooth over them without losing the productivity gains of the auto-generated wrapper made possible by SWIG.
(This section can be safely skipped if you’re not very familiar with C or low-level memory management.)
One of the reasons I used Raylib instead of using running a full desktop environment was to minimize the resources I was using on the system. While I knew using Ruby was already adding some overhead, I wanted to make sure I wasn’t straying too far from that goal. My investigation reveals the SWIG-generated Ruby extension won’t introduce memory leaks into your application.
As discussed above, the SWIG-generated extension defines Ruby classes for each C struct it encounters. Whereas Raylib heavily uses stack-allocated, pass-by-value semantics with these structures, the same structures are instead heap-allocated in the Ruby extension.
Let’s look at the color structure. In Raylib, this structure is a simple collection of four bytes:
typedef struct Color {
    unsigned char r;
    unsigned char g;
    unsigned char b;
    unsigned char a;
} Color;
In the Ruby extension, the structure is wrapped up in a Ruby class:
// In the initialization function
SwigClassColor.klass = rb_define_class_under(mRaylib, "Color", rb_cObject);
rb_define_method(SwigClassColor.klass, "initialize", _wrap_new_Color, -1);

// Heavily simplified implementation of constructor
VALUE _wrap_new_Color(int argc, VALUE *argv, VALUE self) {
  struct Color *result = (struct Color *)calloc(1, sizeof(struct Color));
  DATA_PTR(self) = result;
  return self;
}
Notice how the constructor allocates memory on the heap using calloc. This presents a natural question: does the extension clean up this allocated memory when the Ruby Color object is garbage collected? It turns out SWIG also generates a destructor to clean up this memory:
// In the initialization function
SwigClassColor.destroy = (void (*)(void *)) free_Color;

// The full implementation of the destructor
SWIGINTERN void
free_Color(void *self) {
    struct Color *arg1 = (struct Color *)self;
    free((char *) arg1);
}
This is reassuring, but I wanted to see for myself this prevented memory leaks in practice. So, I tried a few experiments. I wrote three test programs that simply ran Raylib’s main loop, and I graphed how much memory the current process was using over time. The memory usage was queried using the following code:
# `$$` represents the correct program's process ID. Run `ps` and find the line
# containing information about the current process.
pid, size = `ps ax -o pid,rss | grep -E "^[[:space:]]*#{$$}"`
  .strip
  .split
  .map(&:to_i)
The three programs tested different scenarios.

In the first program, I manually created a Ruby extension. This extension defined a function that simply allocated some memory on the heap but never freed it. I called this function multiple times per frame. The memory usage grew rapidly, as expected.
In the second program, I called Color.new multiple times per frame, then added these objects to a global array. Because the array held onto these objects, the objects were never garbage collected, and the memory usage grew.
In the last program, I called Color.new multiple times per frame, but I didn’t keep around any references to these objects. Thus, the objects were garbage collected frequently, and the memory usage stayed constant.
With these experiments, I was confident my memory usage tracking was working, and I wouldn’t have any issues with memory leaks when using my Raylib wrapper.

(This section can be mostly skipped if you’re not very familiar with C or low-level memory management. Just copy the specified code below into your raylib.i file and re-compile your native extension.)
While SWIG does a great job of mapping C constructs into Ruby constructs, there are times when the automated conversion doesn’t work so well. For example, there’s a function for drawing a polygon that takes an array of Vector2 structures. In typical C fashion, the function takes a pointer to the first structure, and a count of how many structures are present in the array:
void DrawPolyEx(Vector2 *points, int numPoints, Color color);
Unfortunately, in Ruby, you won’t be able to allocate space for multiple Vector2 objects contiguously in memory. What we actually want to do is:
We can achieve this using a SWIG typemap. This typemap will recognize a particular pattern, namely the two parameters we want to replace in the above method signature. The typemap will then insert some code we specify at the beginning of any auto-generated function that wraps around a matching library function.
Insert the following code into ext/raylib/raylib.i:
%typemap(in, numinputs=1) (Vector2 *points, int numPoints) {
    if (!RB_TYPE_P($input, T_ARRAY)) {
        SWIG_exception_fail(
                SWIG_TypeError,
                Ruby_Format_TypeError(
                    "",
                    "array of struct Vector2 *",
                    "DrawPolyEx",
                    1,
                    $input));
    }

    $2 = RARRAY_LEN($input);
    $1 = malloc($2 * sizeof(Vector2));

    for (int i = 0; i < $2; i++) {
        VALUE entry = rb_ary_entry($input, i);

        void *vec2;
        int res = SWIG_ConvertPtr(entry, &vec2, SWIGTYPE_p_Vector2, 0);

        if (!SWIG_IsOK(res)) {
            SWIG_exception_fail(
                    SWIG_ArgError(res),
                    Ruby_Format_TypeError(
                        "wrong array element type: ",
                        "struct Vector2 *",
                        "DrawPolyEx",
                        i + 1,
                        entry));
        }

        $1[i] = *(Vector2 *)(vec2);
    }
};
The code does the following:
Vector2 * and storing it in the C array.This process allocates a new array on the heap (it may be possible to allocate on the stack, but I haven’t gotten that working yet). This means, after the call to the underlying library function, we need to free the newly-allocated memory. Again, we can use a SWIG typemap, which we insert into the same file:
%typemap(freearg) (Vector2 *points, int numPoints) {
    free($1);
}
This is one more place where we need custom code specific to Raylib’s functionality. Once again, this does mean our extension is more sensitive to updates in Raylib’s API, but I don’t know of a way around this.
Finally, there are a handful of Raylib functions that return a pointer to a heap-allocated array. This is in contrast to returning a structure by value, like most functions in the library. One example of such a function is GetImageData(Image), which returns an array of Color. Because I haven’t used this function in Ruby, I don’t know what additional work I need to do in order to support its use.
It’s already nice to access Raylib from Ruby, but the resulting code isn’t always the most idiomatic. Other interfaces to Raylib often spend enough time creating the wrapper by hand that it becomes hard to create higher-level abstractions over the C-style APIs. Because SWIG saved us so much work, I’ve found it easier to create some of these abstractions.
I discussed in my last post that SWIG wraps Raylib structs using Ruby classes. These classes are given no-parameter constructors, along with getters and setters for each of the structure’s fields. This makes constructing objects of these types verbose. For example, to create a reddish-brownish color, you need to write:
color = Color.new
color.r = 128
color.g = 64
color.b = 32
color.a = 255
You can, as I said before, create a helper method inside the Raylib module to create and initialize colors more conveniently. However, we can go one step further and re-define a class’ constructor. The important part is to call the original, SWIG-defined constructor in this new constructor so as to perform the initialization SWIG set up for us:
module Raylib
  class Color
    # Re-define the auto-generated constructor so parameters can be passed
    # during initialization.

    alias_method :swig_initialize, :initialize
    def initialize(r, g, b, a = 255)
      swig_initialize
      self.r = r
      self.g = g
      self.b = b
      self.a = a
    end
  end
end

color = Raylib::Color.new(128, 64, 32)
When experimenting with many small Raylib-based applications, I found myself writing the same top-level structure over and over again:
Raylib.InitWindow(500, 500, "Window title")

Raylib.SetTargetFPS(30)
until Raylib.WindowShouldClose
  # Do some per-frame processing like checking inputs

  Raylib.BeginDrawing
    Raylib.ClearBackground(RAYWHITE)
    # Call the drawing APIs
  Raylib.EndDrawing
end

Raylib.CloseWindow
The use of WindowShouldClose, BeginDrawing and EndDrawing felt like low-level APIs that could be abstracted over. In C, this is harder to achieve because the part that changes from application to application is the code inside the loop and the drawing block. Ruby, on the other hand, provides us with a powerful tool to implement this abstraction: blocks.
First, I collapsed the main loop with the FPS configuration, since the loop runs at the specified FPS. I also collapsed the closing of the window, as I always wanted to close the window when the main loop finished.
module Raylib
  def self.main_loop(fps: 30)
    Raylib.SetTargetFPS(fps)

    yield until Raylib.WindowShouldClose
    Raylib.CloseWindow
  end
end
My next abstraction collapsed the BeginDrawing and EndDrawing calls together. This is not only a convenience, but a safety feature, as EndDrawing is what allows the application to sleep in between frames instead of using up 100% of the CPU. With this abstraction, it’s not possible to forget the EndDrawing call.
I also found myself always clearing the background on each frame, as I redrew the frame based on the latest data. For this reason, I decided to collapse the ClearBackground call into this abstraction as well.
module Raylib
  def self.draw_with_background(background_color)
    Raylib.BeginDrawing

    Raylib.ClearBackground(background_color)
    yield

    Raylib.EndDrawing
  end
end
With these two abstractions, my top-level application structure is terser, freeing me to expend more cognitive load on the code unique to each application.
Raylib.InitWindow(500, 500, "Window title")

Raylib.main_loop(fps: 30) do  # we can omit the FPS if we want 30 FPS
  # Do some per-frame processing like checking inputs

  Raylib.draw_with_background do
    # Call the drawing APIs
  end
end
Because I want the same source code for my application to work on my laptop and my Raspberry Pi, I don’t check in my platform-specific extension binary to version control. Instead, I check in the SWIG interface file, then build the extension on each platform. To ensure I don’t have run multiple commands manually, possibly making mistakes along the way, I needed an automated pipeline with the following requirements:
To implement an automated pipeline for building the native extension, I use Rake, a build tool commonly used in the Ruby ecosystem. You can install Rake using:
gem install rake
Or by using Bundler.
Using Rake entails creating a file called Rakefile with the Ruby code needed to build the extension. My Rakefile consists of two parts. First, I define a “task” that actually executes the commands needed to build the library. Here is a simplified snippet:
desc 'Build the raylib C extension'
task :raylib do
  # Read environment variables to determine the correct paths. In my actual
  # Rakefile, I allow configuring the include and library paths for Raylib
  # individually, so this part is more complicated.

  raylib_install_path = ENV['RAYLIB_INSTALL_PATH'] || '/usr/local'
  raylib_header_install_path = "#{raylib_install_path}/include"
  extconf_raylib_path_args = "--with-raylib-dir=#{raylib_header_install_path}"

  Dir.chdir('ext/raylib') do
    sh [
      'swig',
      "-I#{raylib_header_install_path}",
      '-D__STDC__',
      '-D__STDC_VERSION__=199901',
      '-ruby',
      'raylib.i'
    ].join(' ')

    ruby "extconf.rb #{extconf_raylib_path_args}"

    sh 'make'
  end

  cp 'ext/raylib/raylib.so', 'lib/'
end
Just like Raylib’s own Makefile, I use environment variables to configure where to find Raylib’s header and library files. These variables are the same ones used by Raylib’s own Makefiles, allowing me to define them globally on my system. Then, I use SWIG to generate a C wrapper, use extconf.rb to generate a Makefile and build the extension using the Makefile. Finally, I copy over the final library into a lib directory.
The lib directory is also where I put my Ruby convenience methods I talked about earlier.
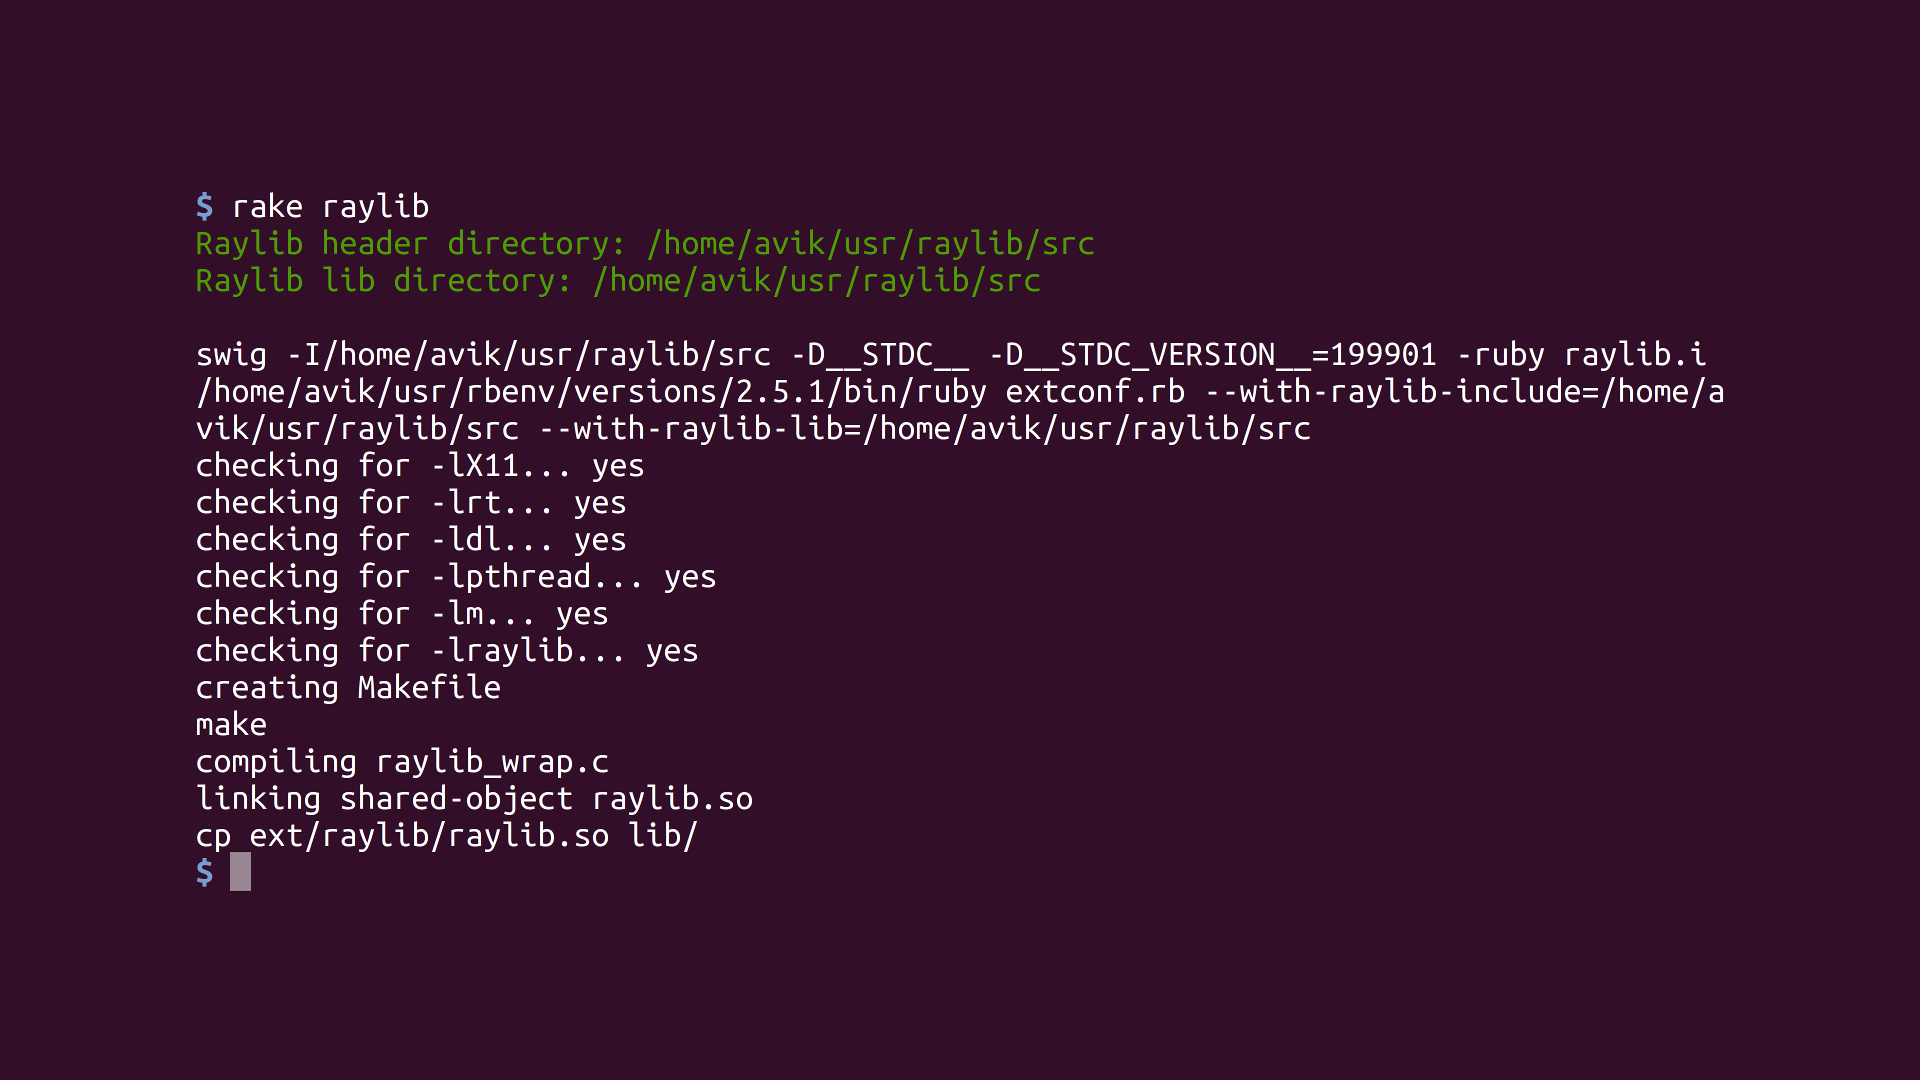
All of this allows me to build the extension with one command:
rake raylib RAYLIB_INSTALL_PATH=/path/to/raylib
bundle exec rake raylib RAYLIB_INSTALL_PATH=/path/to/raylib  # if using Bundler
The Rakefile also configures what should be considered “build artifacts” to clean up:
require 'rake/clean'

CLEAN.include('ext/**/*{.c,.o,.log,.so}')
CLEAN.include('ext/**/Makefile')
CLOBBER.include('lib/*.so')
The CLEAN files are the intermediate build files, not including the final library (raylib.so). These files are produced during the building of the library, but they aren’t required once the library is built.
To simply clean up these intermediate files, I can run:
rake clean
bundle exec rake clean  # if using bundler
The CLOBBER files additionally include the final library. This allows me to not only clean up the intermediate files, but also wipe out the final library so as to leave my project in a freshly-checked out state:
rake clobber
bundle exec rake clobber  # if using bundler
The second consideration is to make sure the build runs slightly differently on my laptop compared to my Raspberry Pi. In practice, this means requesting different libraries to be linked into the extension based on the platform.
Again, like Raylib itself, I use the PLATFORM environment variable, set to either PLATFORM_DESKTOP or PLATFORM_RPI in order to determine which libraries to request in extconf.rb.
Then, to make configuring the platform-specific libraries easier, I created a small Library data structure that defines the name of the library, and an optional path where to look for the library. I create a list of such libraries depending on the specified platform, then go through the list asking mkmf to link in this libraries into the extension.
As a reminder, I talked about linking libraries in my last post. I also discussed which libraries are needed on each platform in an earlier post.
platform = ENV['PLATFORM'] || 'PLATFORM_DESKTOP'

class Library
  def initialize(name, opts = {})
    @name = name
    @readable_name = opts[:readable_name] || name
    @paths = opts[:paths] || []
  end

  attr_reader :name, :readable_name, :paths
end

REQUIRED_LIBRARIES =
  case platform
  when 'PLATFORM_DESKTOP'
    [
      Library.new('raylib'),
      Library.new('m', readable_name: 'math'),
      Library.new('pthread'),
      Library.new('dl'),
      Library.new('rt'),
      Library.new('X11')
    ]
  when 'PLATFORM_RPI'
    [
      Library.new('raylib'),
      Library.new('brcmEGL', paths: ['/opt/vc/lib']),
      Library.new('brcmGLESv2', paths: ['/opt/vc/lib']),
      Library.new('pthread'),
      Library.new('rt'),
      Library.new('m', readable_name: 'math'),
      Library.new('bcm_host', paths: ['/opt/vc/lib']),
      Library.new('dl')
    ]
  else raise "Unrecognized platform #{platform}"
  end

# Make sure the libraries are included in the linking step. The libraries will
# be linked in the reverse order of the calls to `find_library`, so search for
# the libraries in reverse order.
REQUIRED_LIBRARIES.reverse.each do |lib|
  raise "#{lib.readable_name} is missing" \
    unless find_library(lib.name, nil, *lib.paths)
end
Writing lightweight GUI applications in Ruby is a huge productivity boost, but there are rough edges to work around. Knowing the wrapper generated by SWIG does not introduce memory leaks gives me the piece of mind to continue using this wrapper. SWIG’s typemaps and my own higher-level abstractions let me effectively utilize Raylib while still writing idiomatic Ruby code. Finally, an automated pipeline for consuming the latest version of Raylib and building a Ruby native extensions means I can experiment with new features efficiently.
With all these quality-of-life improvements, I’ve been able to create a very useful heads-up display that I use everyday.